Login Page in HTML and CSS (Free Source Code)
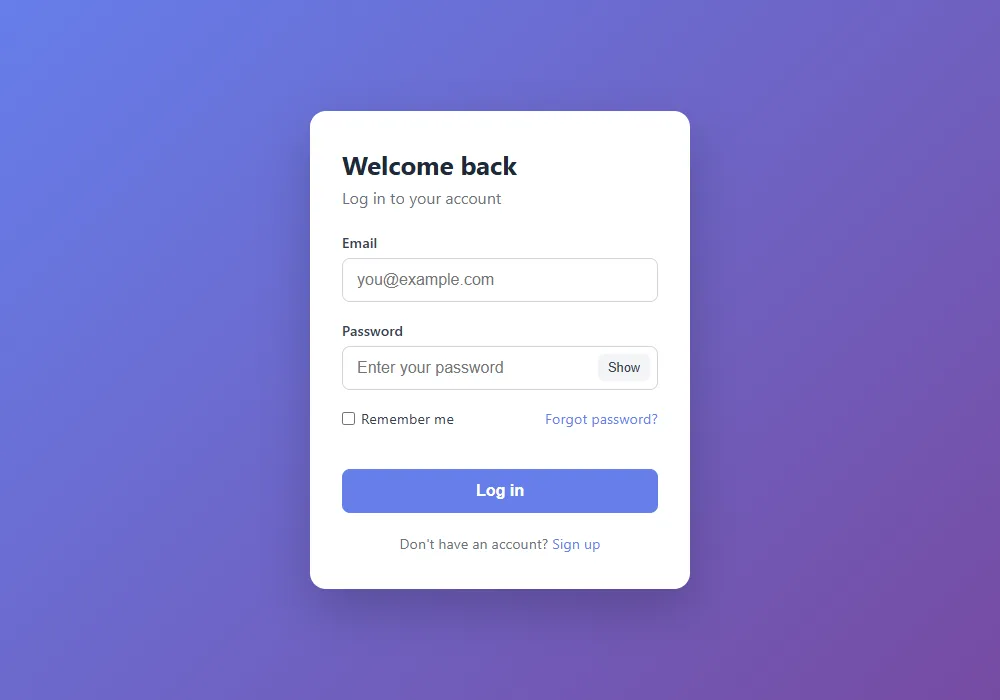
A clean, responsive login form with a show/hide password button and friendly validation. Every line is explained, and you can run it in your browser.
A login page is an HTML <form> with an email input, a password input and a submit button, styled with CSS and centered on the screen with Flexbox. Below you get the complete, tested source code (HTML, CSS and a small JavaScript file for show/hide password and validation), plus an explanation of every part.
Building a login page is a classic project for anyone learning web development. It looks simple, but it teaches you forms, input types, accessibility, responsive layout and basic JavaScript all at once. It is also a component you will need in almost every real application.
By the end of this tutorial you will have a modern login page that works on phones and desktops, with a show/hide password button and friendly error messages. You don’t need to install anything: paste the three code blocks into the HTML, CSS and JS tabs of the HixCode online editor and you will see the result instantly.
Step 1: The HTML structure
Here is the complete markup. Copy it into the HTML tab:
<main class="login-page">
  <form class="login-card" id="loginForm" novalidate>
    <h1>Welcome back</h1>
    <p class="subtitle">Log in to your account</p>

    <label for="email">Email</label>
    <input type="email" id="email" name="email"
           placeholder="you@example.com" autocomplete="email" required>

    <label for="password">Password</label>
    <div class="password-field">
      <input type="password" id="password" name="password"
             placeholder="Enter your password"
             autocomplete="current-password" minlength="8" required>
      <button type="button" id="togglePassword" aria-label="Show password">Show</button>
    </div>

    <div class="options">
      <label class="remember">
        <input type="checkbox" name="remember"> Remember me
      </label>
      <a href="#">Forgot password?</a>
    </div>

    <p class="error" id="error" role="alert"></p>

    <button type="submit" class="login-btn">Log in</button>

    <p class="signup">Don't have an account? <a href="#">Sign up</a></p>
  </form>
</main>
What each part does
<form>withnovalidate: the form groups the inputs.novalidateturns off the browser’s default pop-up bubbles so we can show our own, friendlier messages with JavaScript.<label for="email">: every input has a label linked by itsid. Screen readers announce it, and clicking the label focuses the input. Never replace labels with placeholders only.type="email": shows an email keyboard on phones and lets the browser check the format.autocomplete:emailandcurrent-passwordtell password managers what to fill in, which makes logging in much faster for users.role="alert"on the error paragraph: screen readers read the error out loud as soon as it appears.type="button"on the Show button: without it, a button inside a form acts as a submit button and would send the form.
Step 2: Styling with CSS
Paste this into the CSS tab:
* {
  box-sizing: border-box;
  margin: 0;
  padding: 0;
}

body {
  font-family: system-ui, -apple-system, "Segoe UI", Roboto, sans-serif;
}

.login-page {
  min-height: 100vh;
  display: flex;
  justify-content: center;
  align-items: center;
  padding: 20px;
  background: linear-gradient(135deg, #667eea, #764ba2);
}

.login-card {
  width: 100%;
  max-width: 380px;
  background: #fff;
  padding: 36px 32px;
  border-radius: 16px;
  box-shadow: 0 20px 50px rgba(0, 0, 0, 0.2);
}

.login-card h1 {
  font-size: 1.6rem;
  color: #1f2937;
}

.subtitle {
  color: #6b7280;
  margin: 6px 0 24px;
}

label {
  display: block;
  font-size: 0.9rem;
  font-weight: 600;
  color: #374151;
  margin-bottom: 6px;
}

input[type="email"],
input[type="password"],
input[type="text"] {
  width: 100%;
  padding: 12px 14px;
  border: 1px solid #d1d5db;
  border-radius: 8px;
  font-size: 1rem;
  margin-bottom: 18px;
  transition: border-color 0.2s, box-shadow 0.2s;
}

input:focus {
  outline: none;
  border-color: #667eea;
  box-shadow: 0 0 0 3px rgba(102, 126, 234, 0.25);
}

.password-field {
  position: relative;
}

.password-field input {
  padding-right: 72px;
}

#togglePassword {
  position: absolute;
  top: 8px;
  right: 8px;
  padding: 6px 10px;
  border: none;
  border-radius: 6px;
  background: #f3f4f6;
  color: #374151;
  font-size: 0.8rem;
  cursor: pointer;
}

.options {
  display: flex;
  justify-content: space-between;
  align-items: center;
  font-size: 0.9rem;
  margin-bottom: 12px;
}

.remember {
  display: flex;
  align-items: center;
  gap: 6px;
  margin: 0;
  font-weight: 400;
}

a {
  color: #667eea;
  text-decoration: none;
}

a:hover {
  text-decoration: underline;
}

.error {
  color: #dc2626;
  font-size: 0.9rem;
  min-height: 1.3em;
  margin-bottom: 10px;
}

.login-btn {
  width: 100%;
  padding: 13px;
  border: none;
  border-radius: 8px;
  background: #667eea;
  color: #fff;
  font-size: 1rem;
  font-weight: 600;
  cursor: pointer;
  transition: background 0.2s;
}

.login-btn:hover {
  background: #5a67d8;
}

.signup {
  text-align: center;
  margin-top: 20px;
  color: #6b7280;
  font-size: 0.9rem;
}
The important parts explained
- Centering the card:
.login-pageusesdisplay: flex; justify-content: center; align-items: center;withmin-height: 100vh. That places the form in the middle of the screen. If centering is new to you, read how to center a div in CSS. - Responsive width:
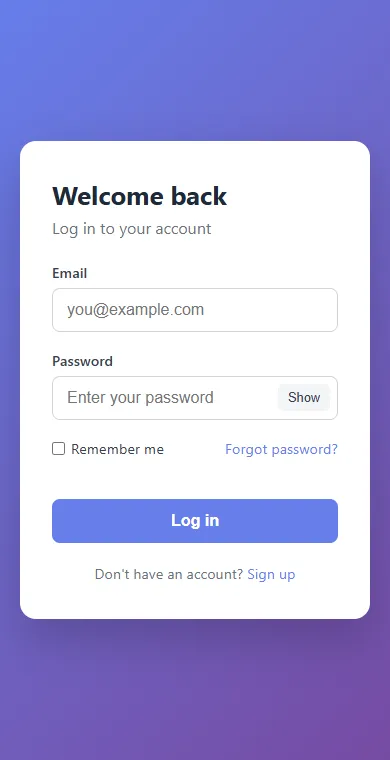
width: 100%; max-width: 380px;lets the card shrink on small phones but never grow too wide on large screens. Thepadding: 20pxon the page keeps it away from the screen edges. box-sizing: border-box: padding and borders are included in the width, so inputs set towidth: 100%never overflow the card.- Focus styles: we remove the default outline but replace it with a colored border and a soft
box-shadowring. Never remove focus styles without a replacement: keyboard users need to see where they are. - The Show button:
.password-fieldisposition: relative, so the button can be placed inside the input withposition: absolute. The input gets extra right padding so typed text never hides behind the button.
Step 3: Show/hide password and validation (JavaScript)
Finally, paste this into the JS tab:
const form = document.getElementById("loginForm");
const email = document.getElementById("email");
const password = document.getElementById("password");
const toggle = document.getElementById("togglePassword");
const error = document.getElementById("error");

// Show / hide the password
toggle.addEventListener("click", () => {
  const isHidden = password.type === "password";
  password.type = isHidden ? "text" : "password";
  toggle.textContent = isHidden ? "Hide" : "Show";
  toggle.setAttribute("aria-label", isHidden ? "Hide password" : "Show password");
});

// Friendly validation before submitting
form.addEventListener("submit", (event) => {
  event.preventDefault();
  error.textContent = "";

  if (!email.validity.valid) {
    error.textContent = "Please enter a valid email address.";
    email.focus();
    return;
  }

  if (password.value.length < 8) {
    error.textContent = "Password must be at least 8 characters.";
    password.focus();
    return;
  }

  // Front-end only: send the data to your server here (for example with fetch)
  console.log("Login submitted for", email.value);
  alert("Form is valid! Connect it to your backend to log users in.");
});
Two things happen here:
- Show/hide password. Clicking the button switches the input’s
typebetweenpasswordandtext, and updates the button label andaria-labelto match. - Validation. On submit we stop the default page reload with
event.preventDefault(), check the email using the browser’s built-invalidityAPI, and require at least 8 characters for the password. Errors appear in the red message area and the cursor jumps to the field that needs fixing.
Try it: leave the email empty and click Log in, then type a short password. You will see a clear message each time. With valid input, an alert confirms the form is ready to be connected to a server.
Paste the HTML, CSS and JS into their tabs and test the validation yourself, with no setup needed.
Open the Code Editor →Important: front-end only is not real login
This page is the user interface of a login system. HTML, CSS and JavaScript run in the user’s browser, where anyone can read and change them, so they cannot safely check a password. To make it a real login:
- Send the form data to your server over HTTPS (for example with
fetch()or a normal formPOST). - On the server (PHP, Node.js, Python and so on), look up the user and compare the password with a hashed password stored in the database. Never store plain-text passwords.
- Validate everything again on the server. JavaScript validation only improves the experience; it can be bypassed.
- Limit repeated failed attempts to slow down password-guessing attacks.
- Never put passwords, API keys or secret checks in front-end JavaScript.
Ideas to customize your login page
- Change the colors: replace
#667eeaand#764ba2in the background gradient and the button with your brand colors. - Add a logo: put an
<img>above the heading inside the form. - Dark mode: wrap alternative colors in
@media (prefers-color-scheme: dark) { ... }so the page follows the user’s system setting. - Social login buttons: add “Continue with Google” or “Continue with GitHub” buttons below the form. They need a back-end integration (OAuth) to work.
- Loading state: disable the button and change its text to “Logging in…” while the request is being sent.
Common mistakes to avoid
- Using placeholders instead of labels. Placeholders disappear when you type and many screen readers skip them.
- Forgetting
type="button"on extra buttons inside a form, which makes them submit the form. - Fixed widths like
width: 400pxon the card, which overflow on small phones. Usemax-width. - Removing the focus outline without adding another visible focus style.
- Showing different errors for “wrong email” and “wrong password” on a real site. A single “Incorrect email or password” message is safer.
Summary
You now have a complete, responsive and accessible login page: semantic HTML with labels and the right input types, CSS that centers the card and adapts to any screen, and JavaScript for a better user experience. Next, connect it to a back end, or reuse the same skills to build a sign-up form.
Want to show it off? Add it as a project in your HTML and CSS portfolio website.
Frequently asked questions
Can a login page work with only HTML and CSS?
HTML and CSS can build the form and make it look good, but they cannot check a password. Real login needs a server (for example PHP, Node.js or Python) that verifies the user and creates a session. The front-end code in this tutorial is the part users see.
How do I connect this login form to a database?
Send the form data to a back-end endpoint over HTTPS, usually with fetch() or a normal form POST. The server looks up the user, compares the password with a stored hash (never plain text), and returns a session or token.
How do I make the login page responsive?
Use width: 100% with a max-width on the card, center it with Flexbox, and add padding on the page so the card never touches the screen edges. The code in this tutorial already works from small phones to large monitors.
Is it safe to validate passwords with JavaScript?
JavaScript validation is only for user experience, such as showing a message when a field is empty. Anyone can bypass it, so the server must always validate the data again.
How do I add a show/hide password button?
Add a button next to the password input and, on click, switch the input's type between "password" and "text". The JavaScript section of this tutorial includes a ready-made version.